Tiny Studio for macro flower photography
If you’ve ever poked around professional photographers’ websites, you’ve probably seen classic photos of a studio portrait. The facial features are soft on center yet still sharp, the background is a solid black background:
The classic studio portrait. Source: Unsplash
Studio photography presents a lot of control over the subject than regular outdoor or candid photography. You can move your subject around to the perfect pose, and then correct the light to be as flattering as possible. I have wanted to try studio photography for a while to learn more about lighting, but I have not had the opportunity since I do not own a studio.
To satisfy my urge, I made a tiny makeshift studio out of a black cube shelf, a bike light, and a headlamp. I picked flowers as my subject, as beautiful, forgiving subjects that would not complain about the presence of lack of airbrushing.
Tiny studio attempt #1
The first attempt at a tiny studio began with walking around Glen Canyon and picking some tiny, 1-2” flowers. I set up my Samsung Nx500 with 30mm f/2 lens and started shooting. The setup looked roughly like this:
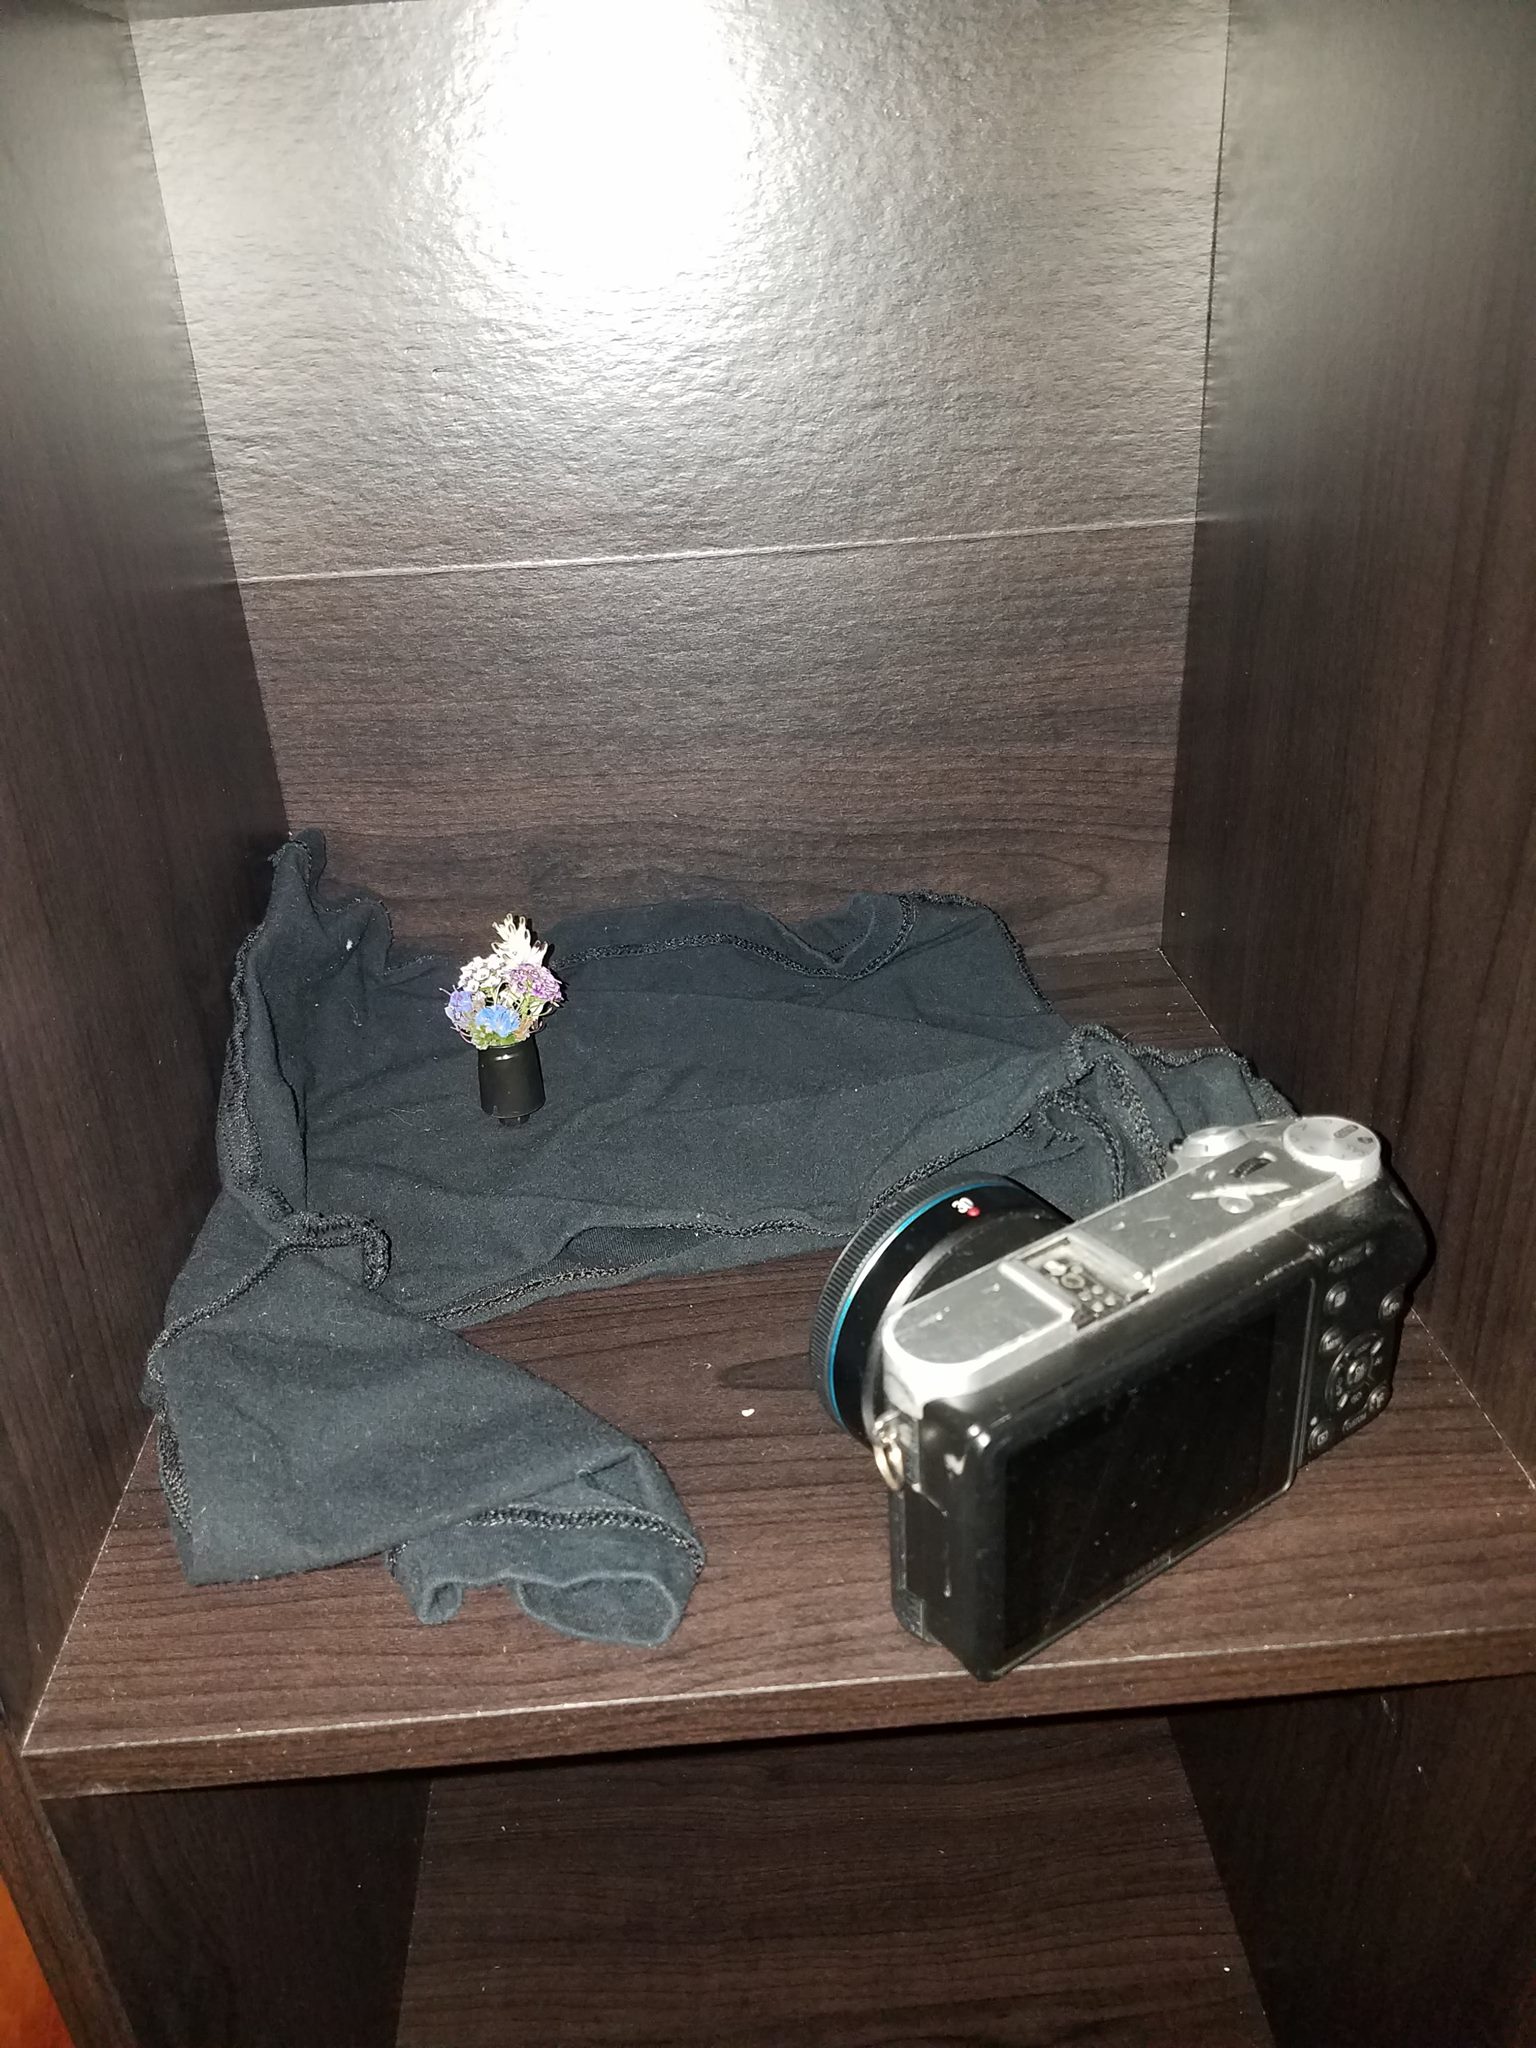
The tiny studio setup.
I learned a few things. One, my flowers were too small. In order to get them in focus I needed to be at least 20cm away from my subject. Since these flowers were only about 2cm tall, at 20cm away I needed to crop my photos to a quarter of their original size. Two, camera shake is real. I should have used a timer! Three, more lighting is always better. My only light was my headlamp, which, while giving surprisingly good colors, limited what angles I could really shoot at. I ended up mostly doing top-lit flowers, which made shadows rather dramatic but overall lighting conditions fairly low. I was forced to shoot at a shallow f/2 in order to have enough light. This, combined with extra noise and tight crop resulted in poor quality, slightly out of focus images, barely good enough for Facebook.
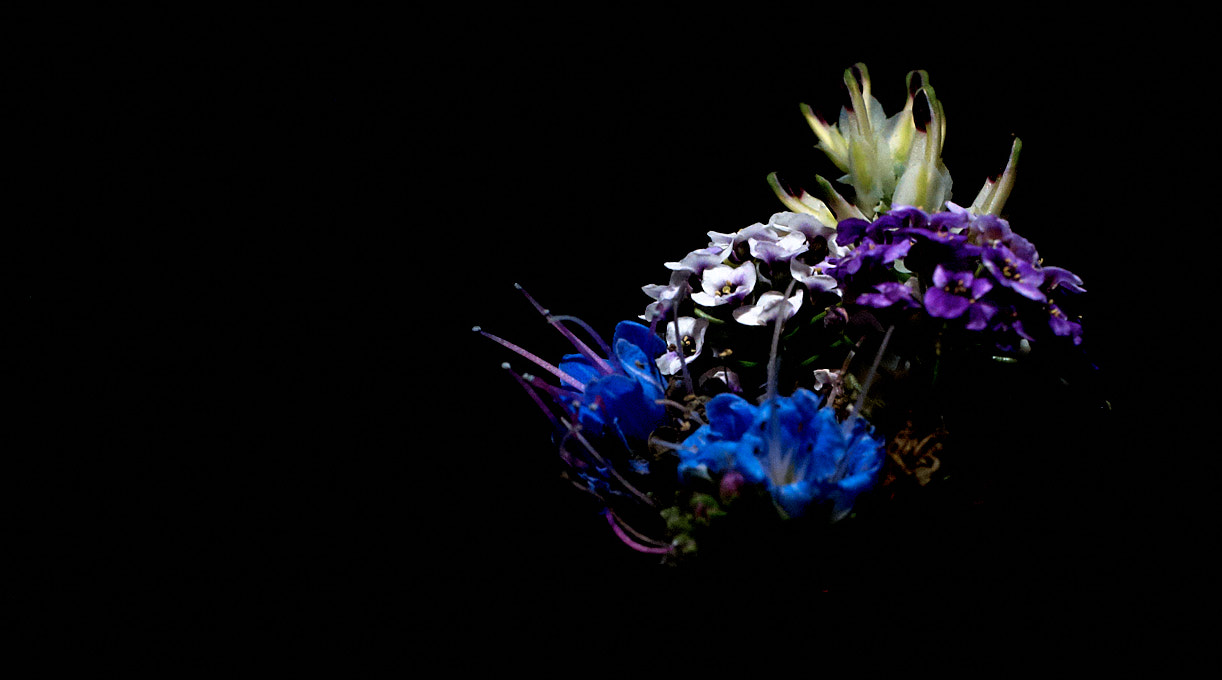 A shot from attempt number one. Notice the shallow depth of field, and blurred edges from camera shake.
Tiny studio attempt #2
For my second attempt, I tried my best to apply what I learned with the following changes:
- Use larger flowers. I do not own a real macro lens, so larger flowers would help reduce the amount of crop I needed to use.
- Brought in a secondary bike light so I could highlight subject from more angles, making softer shadows and overall more light.
- Used a timer on the camera and increased exposure time, again resulting with cleaner pictures and allowing for a smaller aperture.
- I hung flowers from the ceiling of the box to counter wilting over the course of the photoshoot. In processing, all the images for flipped to make them look alive and perky.
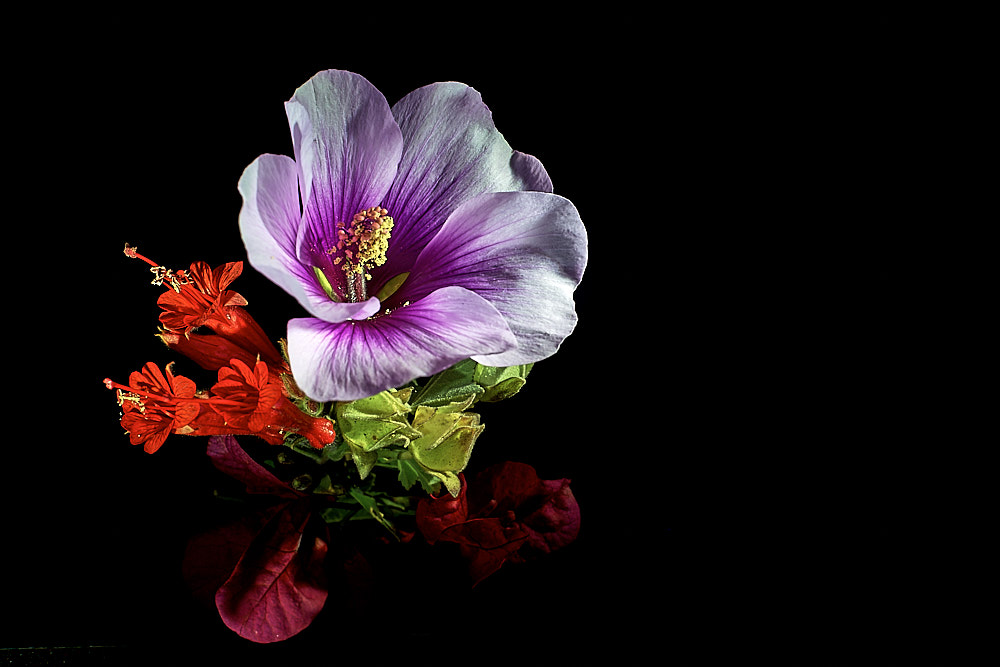
Overall, I was pretty satisfied with the photos I shot.
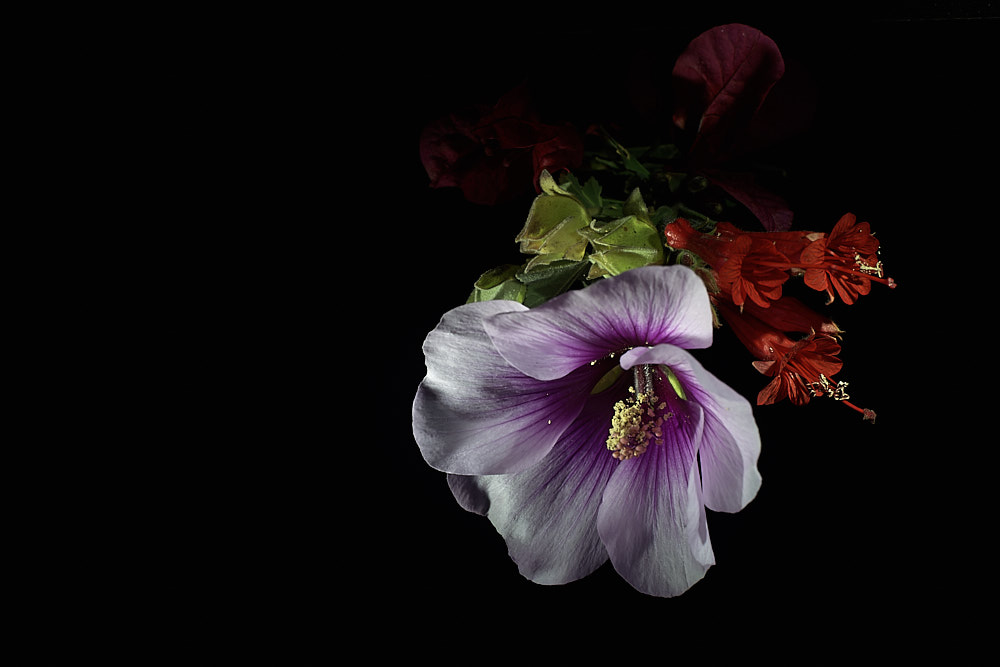
Tiny studio attempt #2 unedited. The photo is shot upside down so the flower hangs into free space unsupported.
Here’s a raw from the photoshoot. As you can see, the flower are upside down, and the multiple lighting makes the shadows less spooky. In the post process, the beautiful microstructure really pops with the additional light. I was able to shoot this at a generous f/9.0 so most of the flower is in sharp focus.
Tiny studio attempt #2 result. The big flower is nicely all in focus with gorgeous velvety microstructure. The red leaves towards the bottom are covering a red clip I stole off a Google guest badge holding the whole thing together.
With two lights, I got to play around with what best accentuated the flower’s beautiful structures. I quickly learned that lighting straight on yielded an effect that just looked like regular camera flash, in addition to illuminating the background in the photo. I found the most attractive lighting was to use a large bright light coming from the top and then a softer highlight from the side to remove harsh shadows. Probably even more lighting would have enabled me to get even better shots, with ever-elusive single pixel sharpness. Still, the flowers were patient models and came out looking their best.
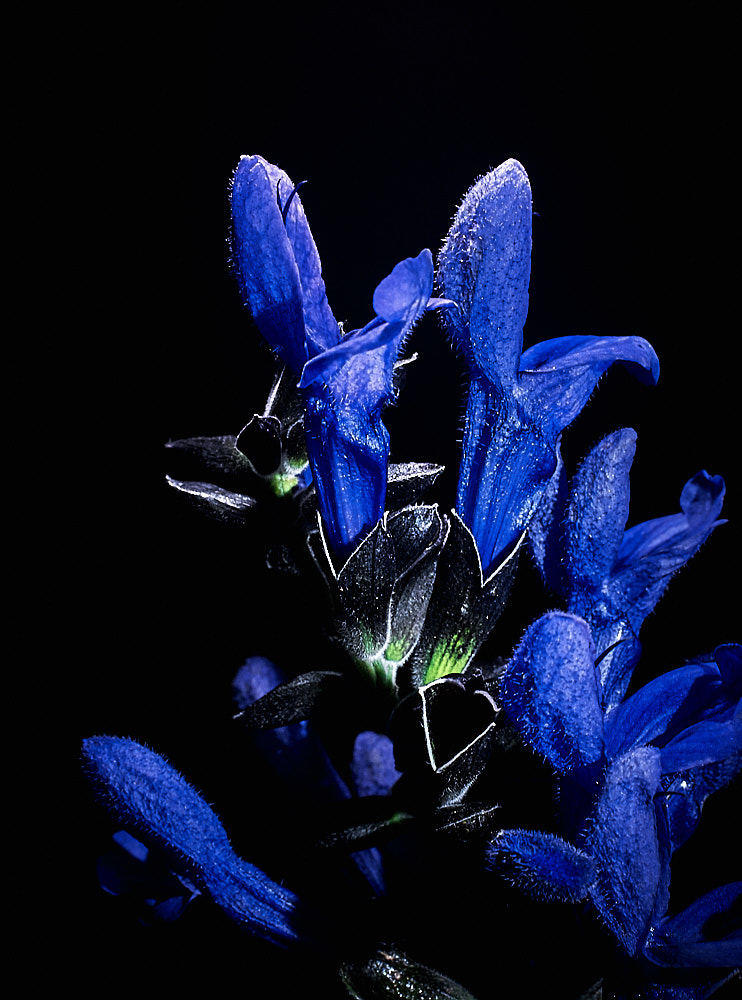
Tiny studio attempt #2: Salvia Guaranatica. Notice the beautiful striking white lining on the edges.
This brilliant blue Salvia Guarantica turned out to be one of my favorite shots, aside from the very classical shot above. The aggressive texture of the hairs on the flowers evokes a strong tactile feelings. The bright green and white lining make me think this style would make excellent designer clothing, or some sort of awesome glass sculpture.
CRI-ing about lighting
One shot made me wonder about the spectrum of the lights I was using:
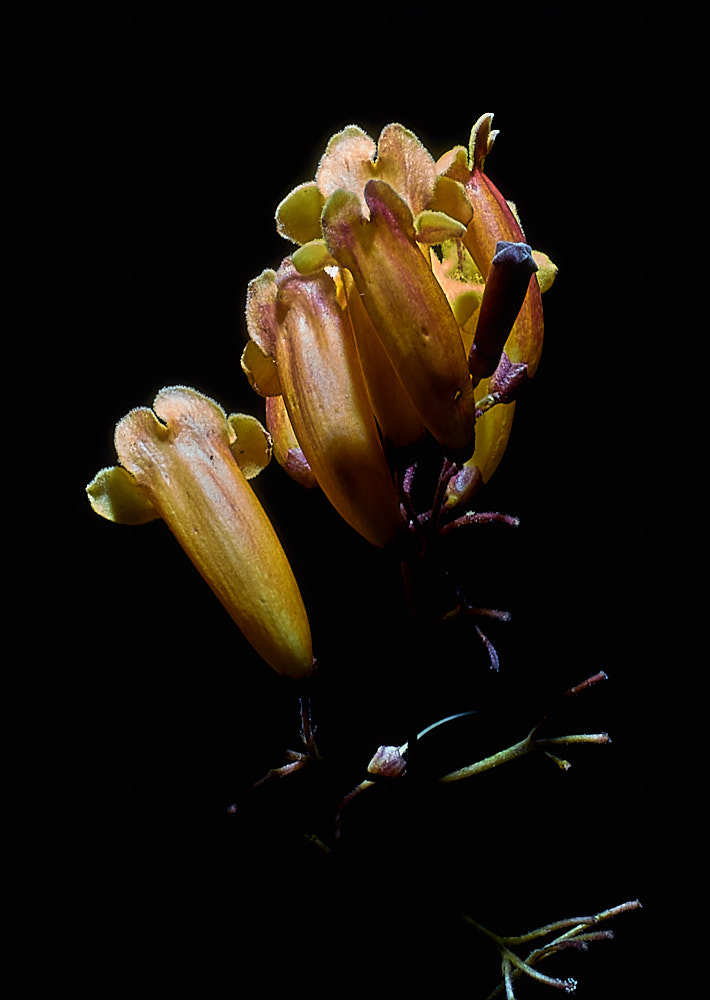
Tiny studio attempt #2: yellow and red flowers
This flower in reality is a bright, sunny-orange-yellow hading into a dark cherry red. But, that doesn’t show up at all in the picture. Instead, it looks slightly glared out, even with unrealistic amounts of saturation correction. For many of the other shots, my headlamp and bikelight were good at capturing real compared to the yellowing incandescents of your typical household. But maybe lights with a better Color Reflective Index (CRI) would do a better job.